Refinished nightstand ideas are a perfect way to add a touch of elegance and charm to your bedroom decor. With a myriad of creative options available, you can transform any old, worn-out nightstand into a stunning piece of furniture that complements your personal style. Whether you prefer a rustic farmhouse look, a sleek and modern design, or a vintage-inspired aesthetic, the possibilities are endless. By refinishing your nightstand, you have the opportunity to express your creativity and showcase your unique personality. One benefit of refinishing your nightstand is the ability to customize it to match your existing bedroom decor. You can choose from a variety of paint colors, stains, and finishes to create a cohesive look that ties the entire room together. Additionally, you can experiment with different techniques such as distressing, stenciling, or decoupage to add texture and visual interest to the piece. Another advantage of refinishing nightstands is the opportunity to repurpose old or thrifted furniture, giving it a new lease on life. Instead of purchasing a brand-new nightstand, you can save money and reduce waste by upcycling an existing piece. This not only benefits the environment but also allows you to create a one-of-a-kind piece that cannot be replicated. Lastly, refinishing your nightstand allows you to unleash your creativity and unleash your inner DIY enthusiast. With countless online tutorials and inspiration boards available, you can find endless ideas to inspire your own unique design. Whether you are a novice or an experienced crafter, the process of refinishing a nightstand can be a fulfilling and satisfying project that adds a personal touch to your living space. In conclusion, refinished nightstand ideas offer a world of possibilities for transforming a basic piece of furniture into a stunning and personalized addition to your bedroom. With the ability to customize, repurpose, and unleash your creativity, refinishing a nightstand is a rewarding project that will leave you with a beautiful and functional piece that you can be proud of.

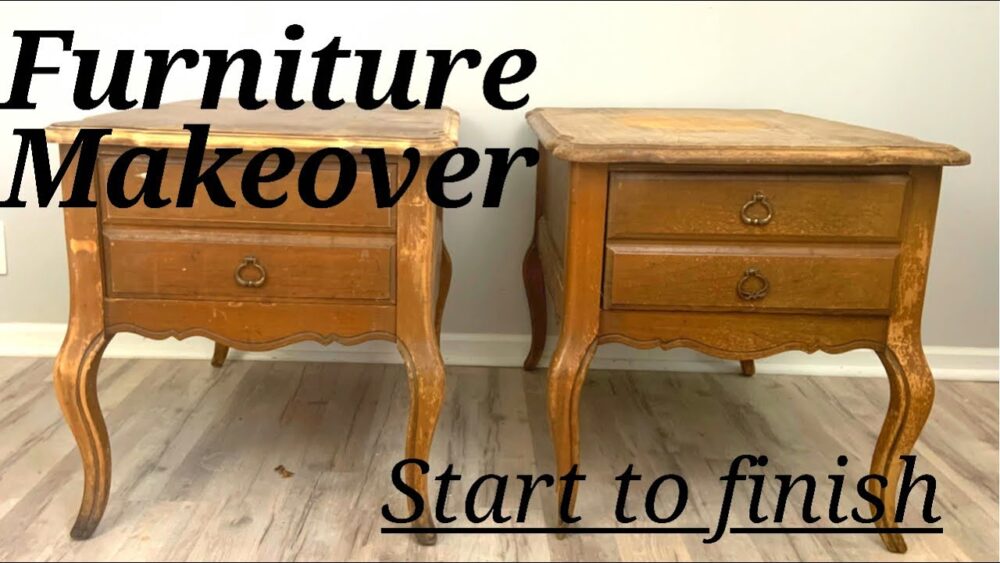
2023 Trending: Start to Finish Side Table Furniture Makeover | How to Update Your Old Tables | Trash to Treasure
| Step | Description |
|---|---|
| 1 | Assess your old table: Examine the condition, material, and design of your table to determine the best makeover approach. Consider the style you want to achieve and the compatibility of the table with that vision. |
| 2 | Preparation: Clean the table thoroughly to remove any dirt or grime. Sand the surface gently to create a smooth base for painting or staining. Use a mild detergent and warm water to wipe the table, ensuring it is free from any residue. |
| 3 | Choose the makeover technique: Decide whether you want to paint, stain, or decoupage the table. Each technique offers a unique way to transform the appearance of your side table. Consider the existing décor and color scheme of the room where the table will be placed. |
| 4 | Get creative with colors: Select a color palette that complements your overall interior design. Opt for bold and vibrant hues to add a pop of personality, or go for more neutral tones to achieve a timeless and sophisticated look. Don’t be afraid to experiment with color combinations! |
| 5 | Apply paint or stain: Use high-quality paint or stain to ensure a durable and professional finish. Apply thin and even coats, allowing sufficient drying time between each layer. Consider using a brush, roller, or even a spray gun depending on the desired effect and your personal preference. |
| 6 | Add decorative elements: Enhance the visual appeal of your table by incorporating decorative accents such as stencils, appliques, or even custom artwork. These unique touches will make your side table stand out as a true work of art. |
| 7 | Protect and seal: Once the makeover is complete, apply a protective sealant to safeguard your newly transformed side table from scratches, moisture, and other potential damages. This step will ensure the longevity of your creation. |
| 8 | Final touches: Consider adding new hardware, such as drawer pulls or knobs, to further enhance the overall look and functionality of your side table. These small details can make a significant difference in the final outcome. |
| 9 | Showcase your masterpiece: Find the perfect spot in your home to display your revitalized side table. Whether it’s in the living room, bedroom, or hallway, let your creativity shine and enjoy the satisfaction of transforming a forgotten piece into a cherished treasure. |
From Trash to Treasure: Transforming Old Tables with a Start to Finish Side Table Furniture Makeover
The Beauty of Refinished Nightstands
Refinishing furniture has become a popular trend in recent years, allowing individuals to breathe new life into their tired and worn-out pieces. One particular item that benefits greatly from refinishing is the nightstand. With a little creativity and some elbow grease, you can transform your old nightstand into a stunning piece of furniture that adds character and charm to your bedroom. In this article, we will explore five compelling ideas for refinished nightstands that will inspire you to give your bedside table a much-needed makeover.
1. Distressed Elegance:
If you’re a fan of the shabby chic aesthetic, a distressed nightstand may be the perfect choice for you. Achieving this look is relatively simple. Start by sanding down the surface of your nightstand to remove any existing finish. Once the surface is smooth, apply a base coat of paint in your desired color. Next, using a sandpaper, gently distress the edges and corners of the nightstand to create a weathered appearance. Finally, apply a top coat of clear varnish to protect the finish and give it a polished look. The end result will be a beautifully aged nightstand that exudes elegance and charm.
2. Bold and Vibrant:
If you’re looking to make a statement with your nightstand, consider opting for a bold and vibrant color. Bright shades like electric blue, fiery red, or sunny yellow can add a pop of personality to your bedroom. To achieve this look, start by sanding and priming the surface of your nightstand. Once dry, apply multiple coats of your chosen color, allowing each coat to dry completely before adding the next. Finish with a clear top coat to protect the vibrant finish and make it shine. This eye-catching nightstand will instantly become the focal point of your bedroom.
3. Modern and Minimalist:
For those who prefer a sleek and contemporary look, a modern and minimalist nightstand is the way to go. Start by selecting a nightstand with clean lines and minimal detailing. For the finish, opt for a neutral color such as white, black, or gray. Apply multiple coats of paint, ensuring each layer is dry before moving on to the next. To add a touch of sophistication, consider adding metallic accents, such as gold or silver drawer handles. This simple yet stylish nightstand will seamlessly blend into any modern bedroom.
4. Rustic Charm:
If you’re a fan of the farmhouse or rustic style, a nightstand with a distressed wood finish is the perfect choice. Start by sanding down the surface of your nightstand to remove any existing finish. Next, apply a coat of wood stain in your desired shade, such as a warm walnut or a rich mahogany. Once the stain is dry, lightly distress the surface using sandpaper to create a worn and weathered look. Finally, apply a clear coat of varnish to protect the finish and give it a polished appearance. This rustic nightstand will add a touch of charm and warmth to your bedroom.
5. Upcycled Vintage:
If you’re a fan of all things vintage, consider upcycling an old piece of furniture into a unique and charming nightstand. Look for vintage suitcases, wooden crates, or even old trunks that can be repurposed into a nightstand. Clean and paint the chosen piece in a color that complements your bedroom decor. For added functionality, consider adding a glass top or a piece of wood to create a flat surface. This upcycled nightstand will not only be a conversation starter but also a functional and stylish addition to your bedroom.
In conclusion, refinishing your nightstand is a fantastic way to breathe new life into your bedroom decor without breaking the bank. Whether you prefer a distressed, bold, modern, rustic, or vintage look, there are endless possibilities when it comes to refinished nightstands. So, roll up your sleeves, unleash your creativity, and transform your old nightstand into a stunning piece that adds beauty and functionality to your bedroom.
Refinished Nightstand Ideas
#Revamp #Upcycle